Monthly Archives: November 2017

The best way to Keep Hanging Flower Baskets Seeking Fresh

Hanging baskets are an efficient strategy to grow flowers that are beautiful in areas around your house you’ll not expect foliage to to look, but it requires work to preserve them. The little room for the roots of the flowers restrict their capacity to distribute and develop, which may impact the look of your hanging basket. It’s possible for you to keep your hanging basket seeking a little little bit of dedication as well as clean, nevertheless, using several easy techniques.

Water your hanging baskets frequently. Use a watering can to completely water your baskets five or four occasions weekly. Add enough water it runs from the bottom of the basket. They require lots of water to prosper since the roots of your flowers have small space to spread and develop. The tiny quantity of soil in a hanging basket tends to dry rapidly as well.

Snip off wilted and dead blossoms using a pair of shears. Snipping blooms will enhance the look of your hanging basket, but will also inspire your plants to produce flowers. Remove any dead or wilting crops at the same time.

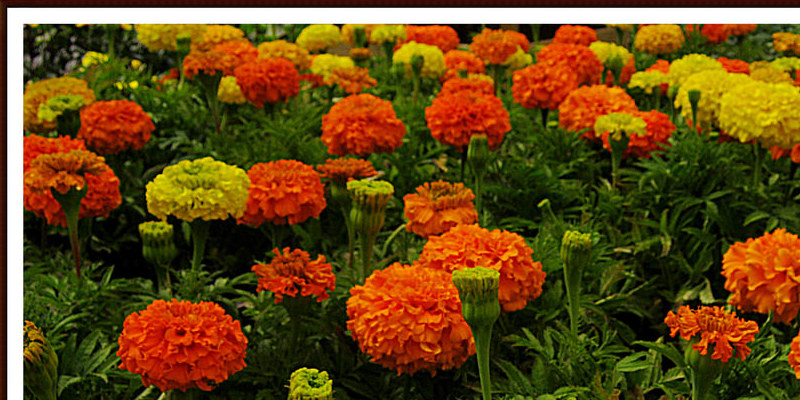
Replant flowers and foliage through the entire season. Add colourful flowers, including petunias or marigolds, across the perimeter in the middle of your basket and trailing plants. Use flowers and foliage that have soil needs and the same developing as the crops currently in your hanging basket. Replenishing the flowers will make certain you’ve plenty of colour and blossoms through the entire season.

Add fertilizer to your own hanging basket. Use slow release fertilizer or 153015 watersoluble a 141414, 20-20-20 once two months to inspire your flowers to create healthful blooms. that are Dissolve the fertilizer, based on package guidelines, because fertilizer which is not completely dissolved can burn off your flowers before implementing it for your flowers.

If other methods do not function move your hanging basket. Baskets uncovered to the the weather, for example ex-treme warmth or wind, can not prosper. Move your basket into a shady or protected place to assist safeguard your flowers and boost their appearance.

See related

The best way to Grow Cork

Planting shades trees around your home’s perimeter helps preserve cooler temperatures in the summer, which could drastically decrease your power expenses. If you’re seeking to plant shade trees around your house, but want your lawn to stand out of the neighbors, consider introducing cork trees. Phellodendron amurense, or the cork tree, reaches heights of its own large canopy and 30 to 40-feet makes it a shade-tree that is strong. Provide the best conditions to make sure your cork saplings that are freshly planted prosper.

Germinating the Seeds

Harvest the fruit from cork tree in October or September. Throughout the fall months the fresh fruit is yellowish green or green and fades to black. In accordance with the United States Forest Service, (see reference 3), each one of the female fruits properties 2 to 3 brown or black-coloured seeds. As they are able to be hard to manually eliminate the Forest Service suggests extracting the fresh fruit from your trees using a pair of pruning shears.

Soak and soften the cork tree’s fresh fruit in a bucket of water. Periodically examine the fresh fruit once the fruit is crushed, which enables easier entry to the seeds and take them off. Remove the seeds and rinse them under a faucet that is cool.

Fill plastic growing trays to to allow for the seeds using a combination of vermiculite and peat moss. These soilless mixes avoid illness and offer drainage. Poke a hole and insert a solitary seeds. Backfill the seeds using moss combination and the unique vermiculite.

Soak each cup with water that is basic and place the plastic trays that are growing in to bags that are zippered. The plastic bags lock in moisture, ensuring the developing medium doesn’t dry.

The developing trays for four to eight months, or before the corks start to sprout in the medium that is growing. Once this happens, eliminate the trays that are developing instantly and transplant the medium that is developing and sprouts in to peat cups that are greater. Provide each cup having a wholesome drink of water and show before a window that receives full sunlight all through all the day. Turn the crops frequently.

Continue to monitor the sprouts and once the sprouts become powerful, healthy seedlings, it’s time to transfer them to your permanent home.

Planting the Saplings

Locate an area in your lawn that receives full-sun. According to Good Gardening, cork trees need full-sun to thrive and prosper in any s Oil.

Dig holes which might be large enough to to support the root balls using a spade. Space the holes a-T least six to eight toes aside to ensure the trees have adequate area to develop.

Carefully eliminate the cork saplings from your cups that are peat. Grasp the sapling close to the heart and twist the cup to avoid injury or breakage. Remove any excessive developing medium from your root balls together with your hand.

Lower the cork saplings to the hole and backfill with all the s Oil that is authentic. Tamper the soil to stop air bubbles from forming around the roots, which may lead to root rot or injury.

Provide the seedlings using a healthful dose of water, but don’t enable the s Oil to become a muddy mess.

See related

The best way to Cut In To HVAC Ductwork

Heating and cooling duct work distributes cold or warm air within a a home, but nevertheless, it has to be correctly installed to be successful. That needs tailoring the ducts to the the room, meaning cutting them to to suit. When measurements alter, into a one running into a room vent from a huge central duct ducts must be cut. There are two main kinds of ducts in homes to-day: sheetmetal and versatile (flex duct). Metal ducts may be either spherical or rectangular; flex duct is spherical, consisting of wires in a insulated jacket that is metallic.

Cut sheet-metal ducts with tin snips, but match the kind to the cut. Use compound snips with offset handles for leverage and slicing blades to reduce straight sections, seams and around spherical ducts or for lines. Switch to the older, more conventional snips, with handles that are large and thick blades for extended cuts.

Mark the cut location or line using a felt tip marker on sheetmetal. Punch a hole in the steel together with the blade of a screwdriver as well as a hammer, inside that is big enough to to match the suggestion of the snips. Cut in the hole to the line, then slice the the line on a duct or across the rectangle or circle opening around a spherical duct.

Cut through seams, which are triple or double thicknesses of sheet-metal, utilizing snips that are compound. Press difficult and put the seam deep; use when they’re too thick for snips, a hacksaw to minimize seams.

Get unique offset right or snips – and left- snips that are curved for cuts that are specific should you be doing lots of strange or curved cutting. Use offset snips for cuts to keep your hand over the metal. Use green-handled snips to reduce red and curves -handled snips to reduce curves that were counter-clockwise, for those who have plenty of curves to reduce. Stick with regular yellow-handled snips that were co mpound for those who transfer the snips to follow the curve line and have just several curves.

Cut flex duct having shears and tin snips or a utility knife. Slice the insulation as well as the metallic layer with all the knife or shears across the spherical flex duct and lay it back to expose the wires that are coiled. Cut each wire using treatment to produce the cuts s O the cut conclusion is straight.

See related

The best way to Install the Front Encounter of a Dishwasher

An out-of-date front encounter in your dishwasher can ruin the entire look of your kitchen. Hideous retro colours scratched steel panels, or a white-face can bring the vibe of your cooking and eating location down. It is possible to upgrade the entire machine in the event that you are looking to get a a more recent product. But when money is an important issue, installing a new front-panel might be a price-conscious choice. When you have eliminated the encounter that is aged, changing it is a pain free procedure.

Open your dishwasher into a 45-degree angle.

Slide the panel that is lower on the front of your dishwasher.

Screw the integrated parts that were trim onto both sides of the panel.

Peel back the protective paper within the the upper panel by about 1 inch.This assists you install the panel, without scratching the entrance inadvertently.

Grasp the panel with your hands hands and slide it onto the very front of the door, protecting-paper side facing in your direction.

Remove the paper entirely.

Screw the integrated trim parts onto both sides of the upper panel.

See related