Category: Eclectic Homes

The way to put in a Plumbing Stub-Out

The plumbing stub-outs would be the end result of this rough-in stage of pipes a residential or commercial construction. They are normally installed while the walls are still uncovered; and after the drywall painting and work is complete, a contractor comes hooks and back them up to the plumbing fixtures. There are two sorts of pipes pipes in a building: the water supply pipes as well as also the waste pipes. Consequently, there are two sorts of stub-outs.

Provide Stub-Outs

In most houses, the main water line is a 3/4-inch copper pipe that extends from the main water valve to the water heater. There it branches into two lines — hot and cold — which stretch throughout the house, buried inside the walls. At every stage where a fixture thrives, a branch line of 1/2-inch pipe tees from each principal pipe and extends to the point of use. The branch line typically terminates a inch or two past the wall or floor below the fixture that it’s services. The contractor solders on a cap that gets cut off prior to connecting the fixture. The capped pipe is a supply stub-out.

Drain Stub-Outs

The principal element of a drain-waste-vent system is that the soil stack. One end of the 3- or 4-inch pipe connects to the sewer along with the other end rises through the roof after being diminished to a 2-inch diameter. Toilet waste lines, typically 3 inches in diameter, connect directly to the soil stack, and fixture drains typically connect to the bathroom waste lines. Plumbers make fixture drains with 2-inch plastic pipes — either PVC or ABS. They stub one of these drain lines from the floor or the wall below a sink and usually, but not always, cap it until it is time to connect the sink.

Installing a Provide Stub-Out

The installation of a water source stub-out begins with installing a cutting edge at a stage in the main supply pipe close to the fixture to be supplied. In an existing water line, you need to turn off the water and then drain the pipe before you cut into it. The usual procedure would be to first construct the branch line all the way to the point at which it stubs out, return and solder all the connections, then solder on a cap. Plumbers typically clamp the pipe to a fireplace straight behind the point at which it emerges from the wall.

Installing a Waste Stub-Out

A significant difference between supply pipes and waste pipes is that waste pipes should slope down from the drain that they service — at least 1/4 inch per foot. Furthermore, elbows and tees have to have sweeps to promote water circulation. Another difference is that fixture waste pipes require heat, so you may need to tie in a pipe that rises to satisfy the main vent if the soil pile is too far away. The magnitude of the pipe and its distance in the opening of this stub-out are dictated by the plumbing code. Consult with a contractor if you are not certain how to proceed.

See related

How to Replace the Chain That Turns a Ceiling Fan On and Off

A busted pull string on a ceiling fan nearly always necessitates replacement of the on/off switch as a repair. A few versions do permit you to reattach the string, but you have to access the switch before deciding whether your fan is among them. Most likely, you will have to eliminate the switch before heading to a shop or searching online for a replacement part.

Turn off power to the ceiling fan by tripping the breaker at the home’s main electrical panel.

Climb a ladder to access the fan and open the cover plate at the base of the fan, at which pull string enters. The plate is usually held on to the remaining portion of the housing with three screws on the face of the box.

Unscrew the nut which retains the pull string and switch in position. You might require a wrench to loosen the nut.

Free the switch from in the housing, but do not detach any wires however. Check whether the string can be reattached. If this is the case, snap it back in place, put the nut back on and reassemble the access cover plate.

Draw a diagram or, better yet, snap a few pictures with your mobile phone. Pay particular attention to how the wires are connected to the switch, and in what order.

Detach the wires in the switch. They may be connected to feed wires with wire nuts. If so, bend the cable nuts counterclockwise to free up the wires. Some versions are wired directly into the switch. If that is true, avoid cutting the wires in the switch assembly. Insert a small screwdriver into the slot adjacent to every wire to pop them loose.

Notice the model number and brand of the ceiling fan in addition to how many rates it’s. Take this information, in addition to the old switch, to a home center so that you can match it up with a replacement part.

Determine how the wires attach to the new switch. Insert wires into slots on the switch in the specific order that they lined up on the old switch. When the new switch has terminals, twist each wire clockwise around the appropriate terminal and then tighten down the terminal screw. When the wires attach to feed wires with wire nuts, then strip about 1/2 inch of insulation in the switch wires and twist the appropriate switch wires along with the feed wires, then twist on a wire nut.

Slide the switch to the fan housing and reattach it with the nut in Step 3.

Reattach the housing cover, then turn the breaker back on.

See related

How to Wire Pool Lights

Many swimming pools have sealed lighting fixtures which can provide lighting for security when swim after dark. Some contemporary swimming pool lights can produce several colors in a series of patterns that are timed to give ambiance as well. Since electricity and water are a dangerous mix, a pool lighting must be completely sealed for security, to prevent water from getting into the element. You may wire pool lights into the electric circuit to your pool with some simple hand tools.

Drain water from the pool before the water amount is no less than 6 inches beneath the pool lighting casing.

Switch off the circuit breaker for the pool or for the whole residence. Open the junction box for the pool light’s wiring connections with a screwdriver. Test the wiring from the circuit in the junction box with a noncontact electrical tester. If the lighting in the tester comes on, turn off other breakers or the main breaker into the home until the lighting no longer illuminates when examining the wires.

Feed a fish tape through the junction box toward the lighting fixture housing. After the tape appears in the casing, overlap about 6 inches of the end of a #8 copper grounding cable and also the tip of the wiring cable for the pool lighting with the end of the fish tape. Wrap a electric tape across the overlapped joint to secure the wires into the fish tape. Gently pull the fish tape from the junction box till the wires seem. Pull around 12 inches of both wires out to the junction box, then eliminate the electric tape and place the fish tape aside.

Cut the end of the #8 copper wire from the roster with wire cutters, then connect the end of the wire to the fixture’s grounding connector with an adjustable wrench.

Coil the additional wire for the fixture and tuck it in the housing. Tilt the fixture and place the base of the fixture on the lip of the casing. Push the surface of the housing forwards, sealing the gasket across the lip of the casing, and tighten the mounting screw into the threaded receptacle on the cover of the casing.

Remove about 6 inches of outer sheathing from the fixture’s diagnostic cable at the junction box with a utility knife. Then strip 1/2 inch of insulation from the tips of the wires with a wire stripper.

Attach the wires into the wiring controller within the junction box as outlined in the setup manual for the pool lighting kit. If your lighting doesn’t have any wiring controller, hook the black wire from the pool lighting to the black wire from the electric panel with a wire nut. Wire the white and bare wires in like fashion, then tuck the wires to the junction box and put in the cover plate.

Turn the circuit breaker and analyze the pool lights prior to refilling the pool.

See related

The way to Secure a Washing Machine Drainage Tray

A washing machine without a drainage tray installed beneath the unit is a problem waiting to happen. If the washing machine or the seams connecting the washer to the pipes spring a leak, then the consequent water damage could prove quite costly. A washing machine drainage tray can easily be installed and plumbed to drain any overflow to a nearby floor drain, splitting any water spillage away from where it can cause damage. It is possible to fasten a washing machine drainage tray to keep it in position and stop leaks from the tray.

Disconnect the washing machine from the power outlet and slip it away from the wall. Turn off the hot and cold water valves and remove the feed seams in the valves using a pair of slip-joint pliers. Pull the drain hose out of the drain line from the wall, and move the washing machine out of the way.

Sweep the region beneath the where the washing machine has been installed and scrape away any things that have stuck to the floor with a 3-inch putty knife.

Drill a 1/8-inch pilot hole 3 inches toward the center of the pan from each of the four corners. Then position the drainage tray to the region where the washing machine will reside. Mark the hole locations on the floor beneath the tray using a pencil. If the floor beneath the tray is tile, remove the tray and drill a pilot hole to the floor for every screw using a 1/4-inch tile drill bit, then tap on a plastic anchor into each hole. If the floor beneath the tile is masonry, use a masonry bit to drill the same four holes before inserting the anchors. For wood floors, no anchor is essential.

Insert a tube of silicone caulk into a caulk gun. Cut the end of the nozzle using a utility knife, and run a thick continuous bead of caulk around the perimeter of the washing machine drainage tray.

Place the tray into position, and push a 2-inch sheet metal roof screw with a rubber washer through each of the four corner holes to the wood or anchor below. Drive each screw before the washer begins to make contact with the tray, but not so far that the washer bulges out from beneath the metal backer.

Boost the washing machine on the tray with the aid of an associate. Then reconnect the water lines, drain line and electrical plug to the outlet.

Connect a threaded PVC coupler to the drain hole in the side of the tray. In case a hole is not currently punched from the tray to adapt the coupler, either tap the perforated knockout for the hole using a screwdriver or drill a 3/4-inch hole using a hole saw and a power drill. Then attach parts of 3/4-inch PVC as required to direct any water from the tray to the nearest floor drain.

See related

What's Lending a Truth & on a Home Mortgage?

The federal Truth in Lending Act (TILA) requires a mortgage lender to provide you with clear, purposeful written advice about the costs of a mortgage when you apply for a loan. The lender must provide you a copy of this advice to keep and do it before charging you some program charges except for a credit rating.

History

Congress passed TILA in 1968. The goal of the action was to promote economic stabilization and better competition in the lending industry by making it much easier for consumers to compare credit offers. Several laws passed because TILA, such as the Real Estate Settlement Procedures Act (RESPA), have put added disclosure requirements on lenders.

Features

Within three days of the time you apply for a mortgage, your lender should provide you with a good-faith estimate of the cost of the loan, the Federal Reserve states. Including a finance charge — the interest rate and lender’s fees represented as one figure — and the yearly percentage rate, which represents interest and lender’s fees as a fixed rate of interest over the life span of their loan. The TILA statement also includes details such as the amount of prepayment penalties and obligations, late-payment penalties.

Misconceptions

If you place in software with several mortgage lenders, then the TILA advice will allow you to compare the prices. However, the Credit Information Center states, many borrowers searching for the prices mistake the APR on the TILA statement for its true rate of interest. You also need to be aware that the data in the TILA is an estimate: Until you sign up an agreement with a lender to lock in the quoted rate, it could rise until you close to the home.

Limitations

You can not use an APR to compare fixed-rate and adjustable-rate mortgages since the APR uses only the very first low rate of the ARM, without factoring in the rate could rise later. Another problem, the Mortgage Professor site states, is that the APR is based on prices over the life span of the loan: If you are going to be living there only a couple of years, which may not be a relevant standard.

Penalties

If a lender violates the TILA principles for disclosure, he could avoid penalties by proving it was an honest mistake or repairing the error within 60 days, the Fair Debt Collection site states. If neither occurs, you can sue the lender for compensation, and she may also face administrative penalties out of one of the nine different federal agencies that manage any component of TILA.

See related

How Long Do You Pay PMI in an FHA Loan?

The Federal Housing Administration (FHA) is part of the U.S. Department of Housing & Urban Development (HUD) and will be the most significant government insurer of mortgages. By securing mortgages on single-family, one- to buildings, manufactured homes and hospitals, financial lenders bear less danger when a borrower defaults on a loan. Neither FHA nor HUD loans cash to borrowersthey guarantee the loans made by creditors. The loans are awarded to borrowers via banks or savings and loan institutions.

About PMI

PMI stands for Private Mortgage Insurance. When a house was bought with less than a 20 percent down 19, PMI is required on mortgage loans. This insurance protects the lender. The borrower pays a percentage monthly of the total financed loan sum. FHA loans required a 3.5 percent down payment, requiring PMI to be compensated on the 96.5 percent loan-to-value quantity. Presently the monthly PMI is 0.55 percentage of the amount of the loan, however at October 5, 2010, the speed will be 0.77 percent.

Other Fees Associated With PMI

In addition to the insurance charge, there is an upfront mortgage insurance fee for FHA loans. The upfront mortgage insurance rate decreases from 2.25 to 1 percentage as of October 5, 2010. This charge is on the loan amount not on the selling costs of the house.

Automatic Cancellation

The Homeowner’s Protection Act of 1998 provides automatic cancellation of PMI once a homeowner has reached 22 percent equity in his house based on the initial purchase price. The cancellation additionally requires that the homeowner continues to be current on obligations an whole year. How much time it takes to reach 22 percent equity is contingent a homeowner qualified for and also the length of the loan. By way of example, a homeowner with a 6 percent interest rate who put down 5 percent will require to reach 10 1/2 years on a 30-year mortgage, or 22 percent equity on a mortgage.

Requesting Cancellation

Once their equity has reached 20 percent homeowners can request the cancellation of PMI. Other prerequisites may be set by lenders . Regardless of reaching the 20% equity minimal, to getting PMI canceled mortgage payments will lower a homeowner’s chances.

Factors

HUD does not regulate the authorities of PMI cancellation. Work with your mortgage lender about canceling your PMI payments. If you are experiencing difficulty getting the charges removed from your mortgage obligations, contact one of these institutions depending upon your creditor’s affiliation: Federal Deposit Insurance Corporation (FDIC), Office of Thrift Supervision (OTS), National Credit Union Administration (NCUA), Farm Credit Administration (FCA), Comptroller of the Currency (OCC) or the Federal Reserve Board.

See related

Can I Understand the Short Sale Procedure?

At a real estate short sale, lenders allow borrowers to sell their home to less than the remaining mortgage balance. Short sales offer you many different advantages for buyers and sellers ; however, the procedure can be complicated and expensive if it’s not executed with ability. Before you think about selling or buying a home via short sale, be sure to educate yourself concerning the short sale process, in addition to its advantages and disadvantages.

Meet to talk about the short sale procedure. Real estate agents can get specialized training during the Short Sales and Foreclosure Resource application referenced under. This site provides a link to allow you to hunt online for an realtor in your area who has been certified through this program.

Visit the local housing agency to obtain details regarding short sales. This step is particularly relevant for homeowners who are thinking about selling their home via short sale. An in-house home counselor will have the ability to direct you through the short sale process and maximize profit on your home.

Attend seminars and workshops on sales. Check at local financing companies, real estate schools and housing offices for classes that are applicable. Take an online course if you can not find a workshop in your area. Online webinars for real estate agents, investors, and homebuyers provide a convenient, affordable way to explore and understand the short sale procedure.

Continue research of the short sale process with reading materials from bookstore or library, check the online resource”Field Guide to Short Sales,” which offers a variety of links for homeowners, sellers and real estate representatives and investors.

See related

Guest Picks: Kentucky Derby Party Fixings and Decor

I am an interior and event programmer who grew up in Lexington, Kentucky, which implies that I don’t mess around when it’s time to sponsor a Kentucky Derby party. Here are a couple of ideas to help inspire you to pull together a stylish and unique party to honor “the most exciting two minutes in sports” Aaaaand they’re off! — Dean from My Little Apartment

Etsy

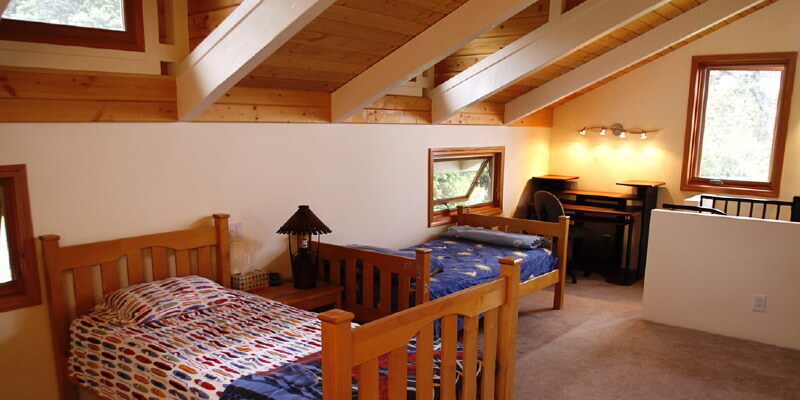
Vintage Tarnished Trophy Cup, Small by Little Flea Vintage – $35

Make your party an immediate winner by incorporating vintage trophies to the tablescape. You may often find them at thrift stores or online. Fill them with flowers, use them on a buffet for utensils, or have guests blindly pick their pony out of the trophy when it’s time to put their bets.

Mark and Graham

Hexagonal Mint Julep – $25

Put a twist on the conventional julep cup with this modern hexagon form. Scatter it with crushed ice, a shot (or two) of bourbon and a drizzle of mint-infused easy syrup. Don’t overlook a straw and a sprig of mint for garnish!

Goal

Rose Wood Wreaths

This is a cheap alternative to a wreath of living red roses, and it’s a lovely nod to the blanket of roses that the horse receives in the winner’s circle. Hang it on the front door or use it as a centerpiece.

Etsy

Florence Broadhurst Horses Stampede Cushion Cover by Steal the Limelight – AUD 89

Don’t forget to bring some Derby decoration to the couch. This Florence Broadhurst fabric is just one of my favorites that are all-time. It’s a little pricy, so a throw pillow is the perfect way to make this horsey print without breaking the bank.

SmartPak Equine

Ribbon Rack – $79.95

Produce a garland with these horse show ribbons. You may hang it on an entryway, above the pub or somewhere outside. You might also integrate the ribbons into a centerpiece or hand them out to the winners.

Etsy

Woodford Reserve Bourbon Whiskey Bourbon Barrel Head by Barrel Creators – $59

Offer your Derby party a genuine touch by serving beers on bourbon barrel lids. These thick oak circles possess a weathered patina and are ideal screens for sausage sandwiches or cheese tortes.

Crate&Barrel

Pronto White Folding Bistro Chair – $59.95

Extra seating is essential for parties at home, especially when there’s a spectator sport involved. These seats fold up for easy storage, work indoors or out, and are similar to the seats used in the boxes at Keeneland, one of the most stunning racetracks on the planet.

Etsy

Classic Kentucky Derby Glasses by Moonlight Decorator – $25

Serve different beverages in classic Derby eyeglasses. All these are plentiful on Etsy and eBay and are often pretty inexpensive. They’re great gifts for the guests to take home.

Kohler Interiors

Bamboo Server

No party is complete without a pub cart. I really like this classic gold bamboo find! It’s the ideal place for visitors to restock their mint julep, along with the bamboo gives a preppy nod to the equestrian vibe.

KV Supply

Diamond Particular Plain Horseshoes

Horseshoes create the ideal small equestrian accents. Use them as coasters, hang them above doorways, repurpose them as trivets or place card holders — the possibilities are endless.

1stdibs

Bronze Horse Head Lamp

If you want to get very fancy, I’d recommend this stunning bronze horse head lamp. Do I even need to explain why? It is awesome. Buy it to the party, and keep it on display indefinitely.

Kentucky Derby Museum

Jockey Silks Plates – $7.95

These jockey silks paper plates are the ideal means to function Kentucky favorites like fried chicken, corn pudding, fresh strawberries and grits.

Lawn Jock

Traditional Red Lawn Jock – $600

Lawn Jockeys are not just for outdoor usage. You could use this guy in the bathroom to hold the toilet paper, as an accent to the hearth or next to some console. You could paint them pick up a classic with a small patina.

Williams-Sonoma

Presidio Silver Plate Tiered Plate Stand – $124.95

This silver tea cake rack is perfect for pimento cheese sandwiches or bourbon balls. If you don’t know what a bourbon ball is, Google it and purchase some immediately. You are welcome.

Allen Booth LLC

Bourbon Barrel Table – $500

This bourbon barrel table is ideal for all those having an industrial vibe to your area — I am speaking to you, Restoration Hardware lovers. But if your inside is on the more modern side, these tables would work well with just about any outdoor decoration.

Anthropologie

Andalusian Bust

What, you don’t want a huge porcelain bust of an Andalusian? I sure do. Though it’s not a thoroughbred, this stunning accent will make certain to let your visitors know that you’re of the horsey set.

AHAlife

Reclaimed Horseshoe Rocking Chair

I’d most certainly enjoy cheering on the ponies whilst sitting in this unbelievably over-the-top horseshoe rocking seat. I really like how bright, glossy and glossy it’s — proof that just ’cause it comes in the country doesn’t mean it’s Americana.

Silver& Pewter Gifts

Pewter Horse Head Drink Stirring Sticks – $23

Don’t forget to pick up some Derby drink stirrers. These pewter choices are great as you can reuse them, but it is also possible to find plastic jockey hats, plants and stirrups in bulk.

Vagabond House

Glass Ice Buckets, Horse Head

A glass ice bucket with pewter horse head handles? Yes, please! Wouldn’t that be ideal atop the posh bar cart? And you’ll require somewhere to maintain the crushed ice hockey you created to your mint juleps. You simply cannot use regular ice in mint juleps.

Daly’s Silks

Framed Racing Silks

I totally adore styled racing silks. They’re colorful, often geometric and can be quite unique to the farm or family who had them framed. These keepsakes are tough to find, so snap one up in the event that you come across them in a thrift or antique shop.

Next: Groom Your Rooms With Kentucky Derby Decor

See related

Guest Groups: It's a Mod, Mod World

Midcentury furniture is in style and for good reason. With clean lines, tufting, simple knobs and fantastic colours and patterns, it’s difficult not to like it. I’ve mixed and matched my own furniture so that my house does not turn in the set of Mad Men, but I’d gladly add one of these pieces to my group. — Melanie from You Are My Fave

Thrive Home Furnishings

Taylor Chair – $849

Sometimes you endanger style for relaxation, but this oversized seat gives you. I love the selection of colours it comes in too.

House & Hold

Eastvold Classic Coffee Table – $920

This traditional coffee table design is great looking while still being quite practical. My pile of monthly publications would get saved inside.

Heal’s

Orla Kiely Lusk Sofa, Pumpkin – GBP 1,756

I saw this small sofa in the Orla Kiely store in New York last month and nearly fainted because it’s so pretty. The dimensions would be perfect for a small space, and the red-orange color would add happiness to any room.

Heal’s

Orla Kiely Lusk Armchair, Moss – GBP 1,196

I can’t await the new Orla Kiely furniture line to fully launch and make its way into the United States. I need to find room in my home for a couple pieces such as this mod seat.

Heal’s

Orla Kiely Giant Abacus Cushion, Slate Blue and Red – GBP 39

Most of Kiely’s designs are reminiscent of the ’60s, but I think that this Abacus pattern is particularly mod appearing.

House & Hold

TrueModern Luna Sofa

If you like the appearance of white but are anxious about it, consider light gray. Isn’t this sofa so stylish?

Heal’s

Fireside Easy Oak Chair, Kvadrat CodaYellow – GBP 1,518

I love the clean lines and light appearance of midcentury furniture. This slick mustard-colored seat is no exception.

House & Hold

Jennifer Delonge Daddy Ottoman – $559

Even if it’s only a place for the toes to land, an ottoman may be good looking too. Additionally, this one comes in tons of colors and designs to match your decor.

Furnishly

Midcentury Tallboy Dresser – $425

If you’re seeking the real deal rather than reproductions of pieces, this site shares vintage furniture listings for the Chicago area. I want this particular necklace!

Monarch Sofas

Amanda Custom Sofa – $823

This sofa can be customized to your liking for a very fair price. I adore the tufting on the back.

Urban Outfitters

Modern Ottoman, Orange – $179

I understand the quality of furniture from Urban Outfitters is not the best, but if you’re searching for an affordable way to furnish an apartment and keep it stylish, they have some great-looking pieces such as this ottoman.

Urban Outfitters

Modern Chair, Gray – $359

This seat has good lines and a fantastic color. Additionally, it’s very affordable.

CB2

Avec Peacock Apartment Sofa – $1,199

I’ve purchased several pieces of furniture from CB2 and have only had good experiences. The color of this sofa is beautiful.

CB2

Dual Pebble Tufted Sectional – $1,799

Sectionals have a tendency to be bulky and oversize, but this one is the opposite. I call the corner spot!

Thrive Home Furnishings

Wallace Credenza – $2,849

For some reason, it’s difficult to find stylish networking storage. A credenza such as this will do the job quite nicely.

Thrive Home Furnishings

Nixon Love Seat, Klein Wheatgrass – $1,499

Putting together this ideabook has convinced me that I need more furniture. This love seat is perfect.

Room & Board

Seville Leather Chair, Camel – $2,699

My husband will tell you that if I buy anything leather, it’s inside this honey colour. It seems better upholstering this traditional seat.

West Elm

Midcentury 6-Drawer Dresser, Acorn – $999

I have the midcenutury nightstand from West Elm, and it’s gorgeous. I was quite excited to see that they now have a similar style in lace form. Now I just need to determine whether to produce the purchase or not.

Room & Board

Eames® Molded Plywood Lounge Chair, Cherry Stain Wood Leg – $889

I’ve determined that if I ever have an Eames slice, I want it to be this seat. What, you don’t dream about that which Eames you’d own?

Anthropologie

Bluhm Credenza – $3,598

You know how kids save their pennies for a special purchase? My pennies are moving towards this gorgeous credenza.

Next: So Your Design Is: Midcentury Modern

See related

How to Connect a Downdraft Stove

A downdraft stove looks and operates much like a typical selection, with the exception that a downdraft stove has a built-in ventilation system, which permits steam, gasses and grease in the cooking process to be captured and vented to the outside from beneath or behind the stove. This system eliminates the need for an overhead range hood, which enables the stove to be more easily set up in a kitchen in which an overhead-mounted range hood would be difficult to install.

Venting Through the Wall

Switch off the breaker into the outlet that forces the stove in the circuit breaker panel.

Measure the size and location of the port opening on the back of the stove, and using a pencil, mark the opening to the wall where the stove will be located. Locate the studs in this wall using a hammer, and mark the stud locations on the wall. If the vent opening does not reside cleanly in between the two nearest studs, check the installation guide to the range about ways to correct the position of the port so you do not have to cut any wall studs. Then reposition the port along with the marks on the wall accordingly.

Cut around the perimeter of the port markers using a utility knife, and remove the piece of drywall. Gently push back the insulation to attain the outside wall sheathing, checking for any electrical cables which might be in the way. If any wiring is impeding the port setup, stop and call an electrician for help in relocating the wiring.

Drill pilot holes at the exterior sheathing and siding corresponding to each corner of the port opening with a very long 1/2-inch drill bit and a power drill. Then, go out and cut the perimeter of the port opening between the four corner holes using a reciprocating saw.

Apply a bead of exterior caulk into the flange around the wall cap included using the stove, then slide the duct throughout the opening and attach the wall cap into the ground with the stainless steel mounting screws. Wipe away any caulking that seeps out of the flange around the ground.

Rank the downdraft stove in front of the opening. Combine the flexible vent link between the duct at the wall along with the port opening on the back stove, then thrust the stove into position. Connect the power cord into the wall outlet. Turn the breaker and test the performance of the stove.

Venting Between Floor Joists

Switch off the breaker into the outlet that forces the stove in the circuit breaker panel.

Tilt the stove back and measure the size and location of the port opening on the bottom of of the stove, and using a pencil, mark the opening onto the ground under the installation place. Locate the floor joists using a stud finder, and mark the joist locations around the ground. If the vent opening does not reside cleanly in between the two nearest joists, check the setup guide to your range about ways to correct the position of the port so you do not have to cut any joists. Then reposition the port along with the marks onto the ground accordingly.

Drill a 1/2-inch hole at each of the four corners of the cutout, taking care that you do not push the bit too deeply into the crawl space below. Then enter the crawl space and locate the four holes of the mounting place. Pull back the insulation, checking for any electrical cables which might be in the way. If any wiring is impeding the port setup, stop and call an electrician for help in transferring the wiring.

After checking for electrical wiring at the install location, go back to the kitchen and cut the perimeter of the port opening between the four corner holes using a reciprocating saw. Then position the stove into position over the hole.

Crawl underneath the kitchen and slip the rectangular duct to the cutout and to the foundation of the port casing beneath the stove. Attach a 6-inch metallic elbow into the duct, and attach the elbow using 6-inch metallic duct clamp.

Add a part of 6-inch duct into the end of the elbow, then connecting the two with a metallic duct clamp. Wrap a part of steel vent strap around the duct and attach it to the nearest joist using a 1 1/2-inch wood screw. Keep adding sections of hanging and duct straps until you arrive at the perimeter wall of the house in which you would like to mount the port.

Drill pilot holes at the exterior sheathing and siding corresponding to each corner of the port opening with a very long 1/2-inch drill bit and a power drill. Then, go out and cut the perimeter of the port opening between the four corner holes using a reciprocating saw.

Apply a bead of exterior caulk into the flange around the wall cap included using the stove, then slide the duct throughout the opening and connect the ducting under the house before attaching the wall cap into the ground with the stainless steel mounting screws. Wipe away any caulking that seeps from the flange around the siding.

Connect the power cord into the wall outlet. Turn the breaker and test the performance of the stove.

See related