Monthly Archives: January 2018

The best way to Use Cotton Mulch

As soon as they have experienced the gin cotton mulch is made in the husks and hulls of cotton crops. Prized because of its ability cotton mulch around rosebushes and is employed as a decorative component in flowerbeds. While farmers in California’s Central Coast and San Joaquin Valley use cotton mulch to safeguard their asparagus crops, it could also gain flowers and the trees in your yard.

On using cotton mulch plan exposed to sunshine and high winds along with areas where you are worried about soil compaction. Cotton mulch is resistant to soil compaction, therefore it enables air, moisture and nutrients to achieve the root system of the plant. Because it minimizes moisture reduction, it is good for for use in locations exposed to warmth or high winds.

Spread a 3- to 4 inch layer of mulch on the floor after transplanting or the emergence of crop or flower seedlings. College Extension suggests eliminating any weeds before implementing the layer M. With respect to quantity and the kind of weeds, remove them by hand or with herbicides. Distribute the cotton hulls roughly six to 12″ away from the foundation to avoid drying out the trunk of the plant, when mulching around bushes.

Spread a 3- to 4 inch layer of mulch on your proven plant beds and borders, avoiding piling the mulch across the bottom of the crops.

Monitor the cover through the growth period that is active when it degrades and re apply. When subjected to moist soil, organic mulches, including cotton, degrade over-time.

See related

The best way to Measure for a Washing Machine

Measuring to get a washer may appear just like a proposal that is simple. Since all washers have four sides, the fundamental measurements are width, height and depth. You’d think that the space which matches these measuring rules that are simple would also match the dimensions of the washer. But that’s not the complete tale. You can find hidden the the area which you believe is a best match, or measurements within that has to be accounted for, might perhaps not be ideal in any way.

Measure the depth, width as well as the height of a washer. These are your fundamental measurements.

Measure how far the hoses in the back protrude. There’ll be a drain hose, warm and cold-water, as well as two hoses. Add this. The hoses should have enough room in it so they impede and do not crimp the water movement in to and out of your washer.

Measure how large the door opens on a top-loader. There should be room enough so the top enable easy loading of your laundry and will open.

Measure the door swing on a front-loading design. A laundry location that is cramped can compromise your loading capacity and WOn’t permit the door to open all of the way. Add the the room it will take to open a front-loader to the total depth.

See related

The best way to Deodorize a Refrigerator

Homeowners invest tens of thousands and hundreds of bucks on fancy, high tech refrigerators, including side-by- side – French-door and freezer versions. Disdain can be caused by bad odors in the interior compartments because of this foods preservation equipment that is essential. Rank smells might be a health and security problem. The supply of odors could be equally in several contemporary refrigerators, water or the air. Some have air-circulation methods and impartial cooling for every single compartment. You might need to pin point and remove odors in the freezer and refrigerator compartments.

Odor Analysis

Fill a standard ice tray with water from your kitchen faucet. Place the ice tray. Wait 1 day for ice to to make in the tray.

Remove the ice tray in the freezer after time passes. The ice into a clear plastic bowl that’s safe for freezers. Place the plate of of ice.

A 1- pint drinking container with 1 cup of water. This leaves the cup half-empty. Place the cup or in the door of the fridge compartment. Make certain it can not spillover. Don’t protect the cup.

Allow the plate of of water to stay in for two times within their respective compartments.

Remove the bowl and cup. Smell and taste the ice for flavors or odors, being cautious not to freeze-burn off lips or your tongue. Sip the water in the glass, trying to feeling style and the same odors. In the event that you identify certain odors, like a classic onion, then the poor smells are coming from a thing that is in the “air” inside the compartments, like spoiled food. In the event that you discover no particular foods that is negative tastes or smells, another odor issue could be emanating in the water that runs to the icemaker and water dispenser.

General Deodorizing Remedies

Throw out expired foods to remove negative odors in-the-air. Like, pour milk down the drain and discard the container in the trash that is exterior. Open storage containers and examine for spoilage and mould progress that might be emitting odors.

Place bins of baking-soda in both freezer or the refrigerator compartments, or only in the compartment that h-AS an odor. Generally speaking, you permit soda to freshen the air in the compartment and can open the very top of the box. Follow the particular ice box deodorizing guidelines baking-soda producers frequently supply on the bundle.

Pour 1 quart of water right into a bucket. Add 1 tablespoon of baking soda. Stir the water. Soak a cleansing cloth in the baking-soda remedy. Scrub and wipe shelves and the the inner partitions of the fridge, targeting stains and places. Use the two cleansing cloths dry and to rinse the partitions and shelves. The baking-soda is deodorizer and a gentle abrasive. Baking-soda is also recommended by some producers for cleansing mildew. Others might forbid the use of baking soda.

Replace the builtin water filter or clean the air filter on the interior of the refrigerator, where applicable and according to manufacturer specifications. An utilized and outdated filter becomes ineffective a T cleansing poor preferences and odors in the compartment and water air.

See related

The best way to Prune a Calathea

Calathea has a a selection of well-known tropical house plants including rattle-snake plant the zebra plant and peacock plant. When grouped together, these decorative foliage crops produce the illusion of paradise. All favor moist, well-drained soil and partial to full shade. When potted, these crops may be developed outside for the summer in warm climates, including Sunset Climate Zones 14 and above — but most choose to be moved inside in late drop.

Pruning Older Leaves

As plants leaves age and mature, it’s common for a number of the leaves to brown or yellow. Removing leaves that are yellowed or browned frequently enhances the look of your calathea plant. Cut leaves in the base where the leaf joins the primary stalk using a pair of scissors. Occasional leaves that are lifeless isn’t an underlying cause of alarm, nevertheless, excessive or repeated yellowing might be a sign of poor or illness lights and needs to be investigated.

Trimming Browning Leaf Edges

Brown edges on leaves might be a consequence of both fertilizing when the soil is watering and are typical with calathea. Either over- or under-watering your crops might trigger leaf edges. Trim leaf edges with scissors away by following the normal curve of the leaf. As it is going to continue to increase despite trimming it’s not required to eliminate the whole leaf.

Deadheading

Dead-heading or pruning blooms that are faded or aged increases the look and channels of your calathea its energy into creating blooms and new foliage. Despite the fact that the calathea blooms could be hardly noticeable and are usually indistinct, normal dead-heading provides your plant vigor that is renewed.

Special Concerns

Calathea prefers – suffers if it’s allowed to dry and moist soil. Plants that wilt as a result of lack of water re-cover gradually and foliage might experience permanent injury — such as browning of leaf tips. This plant prefers even more and benefits or relative humidity of 50-percent from inserting or misting on trays. Fertilize with plant-food diluted 1/2 power once a month throughout the summer months when the plant is actively expanding. When the plant is dormant to permit it to relaxation cease fertilizing in the winter. A void applying fertilizer to s Oil that is dry and use treatment to water the plant.

See related

How to Move a Clawfoot Tub

Renovating your bathroom usually needs relocating a clawfoot tub before the work is completed, then placing it back. In the event that you are setting up a ground that is new or tiling a wall alongside the tub, you will need to transfer the tub from the way of the function. Needless to say, when it’s first obtained, you must move the tub to the area. No matter your requirements, shifting a clawfoot tub is less likely to need expert help than tubs and easier.

Shut off the water-supply to the tub or the water principal if you’re perhaps not capable to gain access to the tub offer.

Loosen the faucet spout with the adjustable wrench, then carry on before the spout comes entirely off, turning together with your hand. The faucet knobs. Knobs need an Allen wrench or Phillips- . Unscrew the overflow and drain pipes using the wrench. Set all faucet and drain assembly parts apart.

Disconnect the drain assembly by unscrewing the drain plug and after that turning the cross-piece in a counter-clockwise direction. Clean out any debris. Use an old rag to eliminate any moisture close to the pipes.

Unscrew the toes in the tub. Transport them individually in the tub. Replace the protecting coasters on the base of the toes if none were present, or install them.

Take the bathroom door down. Tap the pins in the assembly using a hammer and screwdriver to dislodge them. Remove the pins, simply take the door from the body and set it apart.

Place the tub like a furniture dolly, on a system, to transfer it. Use a ramp to improve the tub over tiny flights of stairs or entry ways that are elevated. Enlist somebody to assist you shift the tub down or up stairs. Either way, flip the tub onto its facet to to move it through stairwells or limited doorways.

Reinstall the toes. Turn over the tub and set it about the flooring in the new area. Check the tub to generate sure it’s le Vel. Till it’s if maybe not, install furniture cups beneath the toes.

Connect the over-flow and drain pipes after changing or cleansing any wornout gaskets within the pipes. Connect the the new and coldwater pipes to the inlets on the assembly. Asneeded on each joint use plumbers tape. Screw on the faucet spout.

Turn on the water provide and check the drain and faucet assemblies. Run several inches of water to the bath-tub, then enable it to drain. Rub the pipe connections to the over-flow, drain and faucet assemblies having a rag. Check the rag to ensure no moisture has been acquired by it.

See related

The best way to Care for a Starfish Flower

Native to the deserts of South-Africa, Stapelia gigantean, also called large Zulu flower or flower, creates starfish-shaped flowers with pale-yellow petals striped with bands that are reddish. The starfish flowers emit an offensive odor to attract pollinators like flies. The green stems tinted with develop up right but perhaps not really tall. This succulent plant can produce an intriguing focal point in a water conservation backyard. The starfish flower needs minimum treatment blossom and to develop.

Locate a place with just as much light as possible throughout the day. Dig a hole one foot deep using a shovel and pour a bucket of water to the hole. Let the water totally refill the hole and drain away. Measure the quantity of water drained after 1-5 minutes and multiply by four. In the event the drainage is less than 1-inch an hour don’t plant the flower. Break the soil up having a garden hoe to the depth of the flower container.

Dig a hole a tiny bit broader in relation to the container and as deep as. Measure the soil that is removed and add 1 component of sand for every 2 elements of soil. Mix in a cup of tiny pebbles to enhance the drainage. Plant the flower as deep as they were developing inside their container. Firm the soil throughout the plant.

Soak the soil round the bottom of the plant. Keep the soil throughout the flower moist throughout the growing period. Stop watering subsequent to the flower fades. Keep the plant dry through the winter. Place a short-term shelter including an overturned plant pot across the crops to safeguard the flower.

Feed the flower in the beginning of the period using a well-balanced fertilizer at half-strength. Blossom creation will be encouraged by this.

Check the plant stems for aphids and mealy bugs. Knock any backyard pests off using a powerful jet of water. Look for stem rot, which may occur when this succulent is exposed to water that is too much. Cut the contaminated stems out using a knife and toss a-way them.

See related

The best way to Plant Katsura

In the event you are preparing to begin an Asian- backyard, look no further in relation to the Katsura tree. The Katsura tree (Cercidiphyllum japonicum), indigenous to Japan and China, bears heart shaped leaves that turn from green to red, yellow and orange as the seasons change. It grows nicely in Sunset Climate Zones, therefore the frost is survived by it with issues. Plant the Katsura tree close to your door or patio to talk about its beauty with guests all year long.

Clear weeds and debris to part shade including clay, sand or loam. For brighter autumn foliage colour, choose a website with soil that is acidic. Plant your katsura in fall or spring, after or before the last frost day of your area’s.

Dig a hole at least 3 times the diameter of the root ball and as deep of the katsura tree.

Remove the Katsura tree. In case your Katsura tree is in a burlap bag, cut the bag away. If string is tied round the trunk, cut it off with a utility knife or scissors.

Loosen any roots together with a spade or your fingers. Cut off roots that are dead.

Lower the Katsura tree to the middle of the hole. Pack soil throughout the roots of the tree. Fill the hole.

Provide 1-inch of water per week during its growing period to the Katsura tree. Because Katsura has bad drought tolerance, you might need to water more during a drought.

Apply a 4 inch layer of organic mulch, like leaves, pine needles or wood-chips, round the bottom of the Katsura tree. Spread the mulch as far-out as the branches of the tree extend. Leave a 1-inch gap between the mulch as well as the Katsura tree-trunk.

See related

Dark Green Evergreen Shrubs

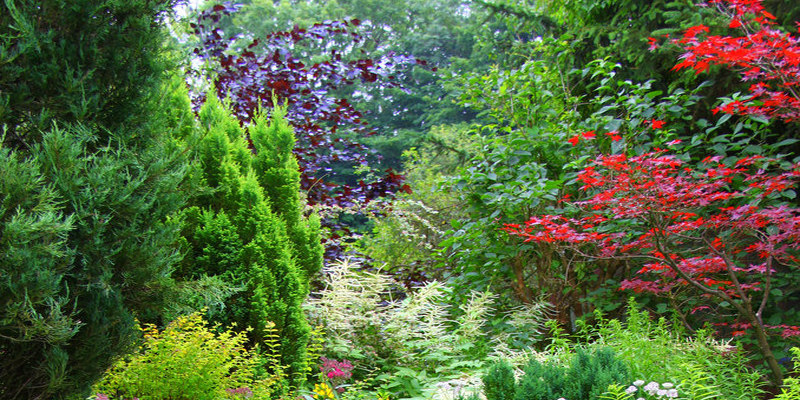
An evergreen shrub is a plant that doesn’t drop its needles or leaves following the growing period. Evergreens provide continuous colour to your own garden or landscape. Evergreen shrubs are accessible in a broad variety of species each with their own characteristics that are particular. Evergreen shrubs create dark or deep green foliage that stand out in gardens filled with vibrant blooms.

Green Velvet Boxwood

Green velvet boxwood (Buxus ‘Green Velvet’) is a low-growing broad-leaf evergreen with dark-green leaves. Normal pruning is handled by this shrub and thrives in moist but well-drained soil. This tolerant plant can grow in shade in addition to partial or total sunlight. It grows in U.S. Department of Agricultural Hardiness zones 6 through 9 and are designed for soil pollution.

Common Camellia

The most popular camellia (Camellia japonica) also called Japanese camellia has shiny and huge dark-green leaves and produces showy flowers in a variety of colors. Growing in USDA Hardiness zones 7 camellia wants partial sun or partial shade in a moist, well-drained soil. This evergreen shrub grows gradually and has roots, but might tolerate drought.

Glossy Abelia

An evergreen shrub in hotter climates and semi-evergreen in the north, glossy abelia (Abelia x grandiflora) has shiny dark-green leaves that change a maroon or bronze shade in great climate. The glossy abelia is resistant to deer, and attracts butterflies and bees. It grows in USDA Hardiness zones 6 through 9 and wants total or partial sunlight and soil with excellent drainage.

Winter Daphne

Winter daphne (Daphne odora) is an evergreen shrub that produces dark-green foliage, powerful aromatic flowers and red berries. This grows in USDA Hardiness zones 7 and needs shelter and partial sunlight. Grow the winter daphne in moist but well- drained soil using fertilizer and the proper mulching.

California Holly

A native to California, California holly (Heteromeles arbutifolia) is a broad-leaf evergreen shrub that reaches heights of up to 25-feet. This drought-tolerant plant has shiny berries and dark-green leaves, and grows through 10. The California holly creates blooms that attract birds and butterflies; it grows in partial or total sun in well-drained soil that is acidic, neutral or alkaline.

Pineapple Guava

Grown as equally an ornamental and as a fresh fruit, the pineapple guava (Feijoa sellowiana) is a difficult evergreen shrub with dark-green foliage, edible flowers and pear shaped fruit. The pineapple guava tolerates a lot of salt in the s Oil, drought problems and pollutions and are designed for different developing conditions. It grows in USDA Hardiness zones 7 through 10 and prefers nicely-drained, neutral or acidic soil.

Sandanqua Viburnum

Producing waxy pink or white blooms, the sandanqua viburnum (Viburnum suspensum) is a fastgrowing evergreen shrub with darkgreen foliage. This plant grows through 10, and tolerates numerous problems including pollution, drought, damp areas and compact s Oil.

Variegated Wintercreeper

The variegated wintercreeper (Euonymus fortunei ‘albo-Marginatus’) grows in USDA Hardiness zones 5 through 9 as possibly an ever-green shrub or ground cover. Its darkgreen leaves are blotched with white markings and generates good fresh fruit or no blooms. The wintercreeper certainly will handle most s Oil circumstances except extremely moist dirt and thrives in partial to complete shade. To keep a shrub-like form, the wintercreeper must be regularly pruned by you.

See related

The best way to Lay Floating Tile

In the event that you are willing to embark on a house improvement flooring task in your investment, tile that is floating is a practical and eye-attractive alternative. It may be installed over an existing tile. Tile that is floating does not need glue or other adhesives to to install the tile to the sub-floor. The tile locks to produce a strong, sleek area and connects. Installing tile that is floating provides appeal and style to your own home.

Make or purchase 1/4 inch wood spacers. Install the spacers round the perimeter of the area, roughly 6″ apart, to ensure growth area for tiles that are floating. The spacers provide a cushion between the wall as well as the tile that is installed. When the tile is installed, you will eliminate the spacers, therefore there is no need to make them attractive.

Place the little bit in a a large part of the area of tile, flush from the spacers. Connect an bit of tile that is floating by snapping it. The tongue-and-groove panels lock in position and match. As you install your row, the tongue should encounter the wall.

After it’s been installed place a woodblock from the tile. Tap the finish of the woodblock using a little rubber mallet to secure the tile. Remove the block that it can be used by you with the piece.

Measure the the area between the finish tile as well as the wall to custom-cut a tile that is floating. Trace the measurements on a bit of tile, allowing space for the wood spacers. Cut the border tile using a damp saw to to match the location. As you total the middle of the area repeat this this process together with every one of the conclusion items.

Until all tiles are locked in spot, install the border tiles across the perimeter of the space. Remove the wood spacers.

Cut and measure cove baseboards or molding to to suit the perimeter of the space. Install cove molding or baseboards across the underside of the wall where it fulfills the tile that is floating. Baseboards and cove molding disguise the growth space.

See related