I built a “cloffice” — an office in a cupboard. Cloffices are done many times before, and I chose to put my own spin on one.
This cloffice was for my 10-year-old daughter’s bedroom, a workspace for her. She’s a bit of a tomboy with a total of four or three items that require hanging. We have tons of other closets in our home, including a sizable walk-in cupboard in our guest room. And next to her cupboard is an integrated cabinet that can hold whatever clothes will need to hang. Her chamber also has a wall unit with eight shelves and eight drawers, as well as a sizable underbed drawer. Lots of storage all around.
When she had been a very girly girl, I may not have decided to go this course. I’m a firm believer, though, in making you home work for you. My children’s cabinets tend to be such lifeless spaces filled with mess that I don’t have any issue with using them for other things that better match their requirements. In this case shifting my daughter’s desk to the cupboard opened her entire room.
The new workspace has really helped her room remain neater than previously. Here’s how it was made by us.
Before Photo
Christina Katos
Christina Katos
The project started out with a normal bedroom cupboard having a double sliding door. We tested out the cloffice concept for a couple weeks with a classic desk to see if it’d do the job. My daughter was pleased with the installation and loved the space that her chamber gained.
I gutted, painted, installed lighting, place in shelves, built a desk and made an organized and fun space for the 10-year-old daughter.
Christina Katos
Christina Katos
I included interesting accessories to maintain craft materials and add personality. Any of these items will be simple to alter as she develops and her tastes change. In the meantime there is plenty of storage to help keep my youthful daughter organized for years.
Christina Katos
We wanted a space for homework, creating, reading and having fun. There would be storage shelves, bins for markers and pencils, and a good deal of desk space.
Christina Katos
Once the cupboard was empty I began by removing the doors, cabinet and shelf rod. (If you worry about resale, then just save these bits to place back) My preferred cleaning crew came in to see mother wielding a crowbar and then pick up the wreck. Be sure that you get all the nails and screws right away if you are doing something similar to this in a kid’s bedroom.
Christina Katos
I then painted the entire cupboard, ceiling comprised, with two layers of Rust-Oleum chalkboard paint. After the paint was dry, I treated the walls to set the chalkboard paint. It’s done by rubbing on the side of a piece of scatter all over the paint and allow it sit for a day. I then rubbed it with a chalkboard eraser and let that sit for a day as well. Then I wiped it all down with a wet cloth.
Christina Katos
The cupboard is 76 inches wide and 20 inches deep. I had enough room to bring a 65-inch-wide desk as well as an Ikea Billy shelving unit on the side. The unit, turned sideways, is not visible from outside the cupboard. A 4-inch gap in the face of the shelving unit into the back wall is perfect for larger items such as board games.
Christina Katos
Next I added an Ikea Fintorp wall storage method. The railing is 221/2 inches wide and contains three caddies for pens, chalk and markers. Extra hooks hold scissors and other tools.
I centered the railing with the introduction of the cupboard. The chalkboard finish came in handy for marking off the studs, which supplied a good spot for procuring the railing to the wall.
Christina Katos
Next came floating shelves and two of Ikea’s Astrid light fixtures that were light. They are plug-in lamps that turn on with a pull button.
I purchased poplar plywood, cut me by fine gentlemen in Home Depot, to serve as a desktop computer. After ensuring it match perfectly, I sanded the edges and gave it one coat of primer and two coats of Benjamin Moore semigloss paint. I primed the entire piece of wood but painted just the top, bottom and front edge, because those are the only sections of the background that would be visible.
Christina Katos
I attached the background with four cleats — strips of wood used to fortify a surface and support items like shelves and desktops. In this case I screwed the cleats to the studs to support the desktop and provide it the floating appearance I was searching for. I made sure to leave room between cleats so that the wires in the wall-mounted lamps could hang back down.
I measured so that the top of the desk was 30 inches away from the ground. Additionally, I made sure it lined up with a few of the shelves in the storage unit. I attached the cleats into the studs and added L-brackets for extra support. I then attached the background with screws underneath.
(Because the bookcase is around the left side of the desk, the background does not reach all of the way into the left wall, so I was not able to put a cleat there. I place a small cleat supporting the door frame instead. It is not visible in the front of the desk and also secures the front-left corner)
Christina Katos
Here’s a shot from beneath the desk, showing how the background attaches to the cleat.
Christina Katos
I added a piece of poplar into the front of the desk with mounts also. It had been hauled into the desk from underneath and helps you to keep the middle of the desk from sagging. It fits perfectly between the front of the desk and the door frame, providing the whole background a more finished appearance.
Christina Katos
We inserted a hole for cords to operate into a surge protector under the desk. My 10-year-old isn’t using an iPad, cell phone or notebook now, but she’ll be later on.
Christina Katos
Christina Katos
Once the desk was I was able to address the issue with wall-mounted light fixtures: the telltale wires running down the wall. I had a way to make them vanish. I bought a cord hider having a glue backing in my hardware store. The plastic D-shaped tube is hollow in the centre with room for one cable. I cut mine into the desired lengths for both cords and coated it with two layers of chalkboard paint to blend in with the wall. Once the strand covers were sterile, I peeled off the backing and stuck them into the wall.
Christina Katos
Using cable tacks I then ran the wires beneath the background and attached them to the cleats on the wall. Cable tacks are similar to large staples with a rounded top to securely hold cords down. They are the perfect way to keep your cords hidden over a baseboard or tacked into a piece of furniture. Both cords in the lamps operate beneath the desk and match up with the surge protector.
Christina Katos
The finished cupboard! The steps weren’t overly involved but were time consuming. The outcome is a unique and fun space that is is a hit with my 10-year-old and would do the job for an adult also.
Christina Katos
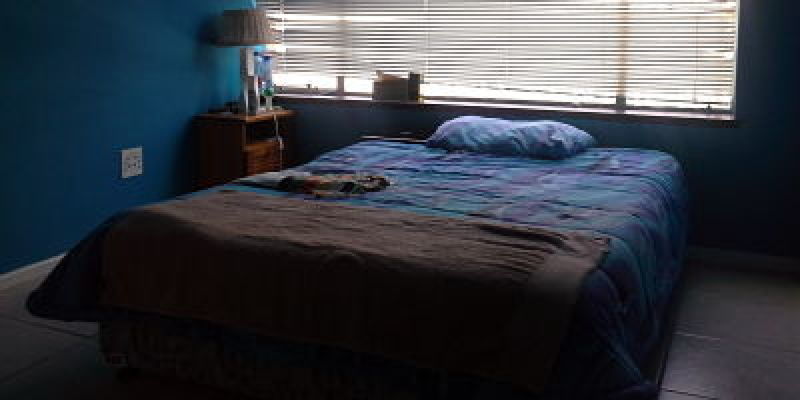
The bedroom is filled with shelving and drawers. A massive wall unit occupies one whole wall and makes up for the cupboard loss.
Christina Katos
Christina Katos
This built-in cupboard fits her few hanging items. (I included the closet rod.) The cabinet appears small from the outside but really reaches into the ceiling interior.
Your turn: please reveal your creative home office!
More clever closet-sized workspaces