Monthly Archives: April 2018

The best way to Grow Heliconias From Rhizomes

Commonly called birds that were fake or lobster claws -of-paradise, the Heliconias don’t develop outside year round except in places like Hawaii. Hardy to U.S. Department of Agriculture hardiness zone 1-0, lobster claws experience injury if exposed to temperatures below 40 degrees Fahrenheit, therefore develop them in large containers indoors or in greenhouses. This short lived flowers for three to four years and perennial grows. Lobster claws grow from rhizomes planted in rich soil that is organically.

Drill holes in the underside of a heavy duty big container using an electric drill. Space the holes similarly across the underside. Cut of screen mesh materials with scissors a little bit the dimensions of the container bottom. Place the mesh in the plant pot to stop the soil.

Mix together equal parts of potting soil, woodchip mulch and peat moss to get a fast draining soil mixture that can hold the correct amount of water for the lobster-claw plant’s roots. Fill the plant pot together with the soil mixture up to 1-inch in the rim.

Dig a hole 1 to 3″ deep, with respect to the dimensions of the rhizome. Place the rhizome in the hole using the most apparent developing factors. Level them downward whether there are roots. Don’t worry excessively about planting the rhizome upside down, as it’ll just have a little longer to produce it to the area.

Water the soil drains out the underside of the container. Place the plant pot – catch and place in a area with indirect light. Growth starts in two to eight months. While the rhizome is developing, keep the soil moist.

Feed the lobster-claw with well-balanced water soluble fertilizer when the plant is approximately a month-old. Feed every 8 weeks after the fertilizer manufacturer’s instructions

See related

The best way to Determine Laminate Flooring Quality

Lots of laminate items also go longer longer, and floors were created to look, feel and even seem like genuine hardwood with no hardwood value tag and wear better in relation to the real thing. The broad selection of flooring supplies on the industry can appear overwhelming, particularly for those who have never installed a floor. To choose a new ground that can assist you as well as your family properly for years to come, do not be be scared ask questions and to look carefully. The more you know concerning the materials you select, the more likely you’re to get a great-quality merchandise.

Ask the salesperson regarding the grade of the product’s. Floors are graded for quality on a three-level scale: best, better and excellent. Products with higher grades could be be more costly, which means you may not be in a position to make your selection with this factor.

Look in a sample of the flooring installed in the shop. Check the alignment of the boards and look for unevenness or gaps. Good-quality laminate floor boards produce a flat area and should lock together.

Examine the flooring sample to view if you’re able to spot the pattern that is repeating. Higher-quality laminate floors have styles with enough selection they look natural. In the event the ground appears machine made, it’s of lower-quality.

Ask the salesperson in the event the materials is immediate- or high pressure. While both processes generate practical flooring, high pressure laminate is a often of better-quality and a a more recent engineering.

Confirm together with the salesperson the product includes a UV area. This assists keep the hard-wood picture on the flooring in great problem.

Look in the label on the materials or request the salesperson exactly what the ISO rankings of the product’s are. Good-quality laminate h AS an ISO score of 9001.

Check the item for a NALFA Certification Seal. The Us Laminate Flooring Association (nalfa.com) certifies laminates after subjecting them to 1 quality assurance assessments, including water-resistance, stain resistance and toughness under different other types of tension.

See related

Essential Tips When Renting a Roll Off Dumpster

Renting a dumpster can be a great solution to get rid of any debris from your house. Whether you are doing a major remodeling at home or maybe you have finally decided to do that spring cleaning you’ve been planning for months, a roll off dumpster is a great option. However, there are a number of important things you will need to keep in mind when you choose a handyman Bloomington in service.

The following are some of the most important ones:

Prepare a Location for the Container

A standard dumpster is relatively big. A 40-yard roll off dumpster, for example, will measure about 22 feet long and 8 feet wide. For homeowners who have a small driveway, such a large dumpster will not fit.  In this case, you need to plan for an alternative space. You can move your car out of the driveway and see if it will work. The goal is to make sure that the roll-off truck can enter your driveway.

Shop Around

There are many dumpster rental companies out there, most of which have unique services. If you are looking to rent for the first time, make sure you take advantage of these options. Instead of hiring the first handyman Bloomington you come across, take some time to look at what various companies are offering and pick a provider that meets your needs and your budget.

Choose the Container Size Carefully

Dumpsters for rent come in different sizes. This diversity in size is based on the fact that different people have different needs. The bigger the dumpster the more money you will pay for it. Bigger dumpsters are also bulky and very difficult to handle. However, it all depends on the job you have. If you are moving a lot of debris then a bigger dumpster will offer great value for money compared to a smaller one. The most important thing is to clearly assess the job at hand.

Avoid Prohibited Items

Each handyman Bloomington service provider has a list of materials that it doesn’t accept. This might include hazardous waste such as car batteries, oils, inflammable materials etc. Before you hire a dumpster, ensure you understand the materials that are prohibited. If you find that you have such materials to move, discuss the matter with the rental service provider for alternative disposal options. Don’t sneak in prohibited items into the debris and assume no one will notice. This will cost you more in the end.

Plan Ahead

You need to have a clear plan on how you will use the dumpster. Have a plan on how the dumpster will be dropped off and how it will be delivered. Create a timeline too for the job and stick to it. This will help you maximize the use of the dumpster.

A handyman Bloomington can help you move a lot of items quicker but you must maximize every rental. Follow the tips above very carefully so you can choose the right roll off dumpster for your needs.

The best way to Remove Wax & Sealer From Vinyl Composite Tiles

Vinyl composition tile is created from chips of vinyl which can be fused together with strain and heat. The tiles are available in various designs and colors and so are made to resemble wood, stone, terrazzo and concrete. Vinyl composition tile is generally employed in locations with high foot-traffic due to the durability. This toughness makes it easy to clear as correctly used chemical flooring strippers and buffer devices not damage it.

Prepare the Ground

Walk the whole ground and examine it for mud, gum or other international products which can be stuck onto the tile. Scrape the international products using a knife up.

Inspect the corners of the workshop where. Scrape the wax buildup out using the knife while being mindful to not dig to the tile.

The ground cautiously using a dust mop to remove dirt and all dust.

Prepare an answer of floor stripper blend, in accordance with manufacturer’s instructions, in a bucket completely specified for the stripper blend. Place a mop using a clear heavy duty head in the bucket.

Fill another bucket with warm water that is clear and place a heavy duty mop involved with it it.

Place the ground-buffer device — using a new, black-coloured pad that is stripping — as well as the wet-vac device conveniently from the workshop. Make certain it is plugged in and ready to go.

Stripping and Waxing the Ground

Soak the mop at a time and use it to the ground — one 10-by-10-foot area using a generous quantity of the solution.

Allow the solution setting on the flooring for roughly five to 1 minutes to emulsify sealer and the wax.

Scour the handled section of the flooring with all the black pad as well as the ground buffer device. In order for the stripper pad moves in a round pattern that continually overlaps the prior circle control the movement of the flooring buffer.

Remove the stripper remedy utilizing the damp-vac device while it’s wet. Don’t try to moist-vac the portion of of flooring in the event the the perfect solution is h-AS dried. It’s necessary to repeat the procedure that is stripping before moist-vacuuming.

Mop the portion of of ground with hotwater and the clear mop to grab and rinse a-way all traces of wax remedy and sealer. Mop the flooring several occasions asneeded to keep it obvious and warm, and alter the water.

Wring the mop out completely and mop the flooring dry.

Move to the next 1-by-10-foot area and repeat the process.

See related

10 Important Considerations for the Bedroom Addition of Your Dreams

painter Escondido, CA is a constant part of any passionate homemaker’s life and if you’ve set your sights on designing the master bedroom of your dreams this coming spring, then you’ll truly appreciate our marvelous tips on what you should consider in your planning process.

Location

Whether it’s on the ground floor facing a garden path or at an upper level of the home overlooking a pool, you want to make sure that your master bedroom is well-placed to take advantage of the surrounding environment. It’s also important to consider how your bedroom layout will affect the rest of the house plan, and whether it enables enough privacy.

If you’re thinking of elevating your master bedroom but don’t have enough space to do so on the existing structure, you can either build it into the existing roof or construct a second floor on top of the current house. Just keep in mind that this route will require new painter Escondido, CA on the existing structure to ensure that it is in line with present-day building codes.

Lightning

These days, you can use various light fixtures to create a unique ambiance in your bedroom. From crystal chandeliers to candles and cove lighting, the options are endless.

Windows

Most homeowners feel that the master bedroom is more appealing when there is plenty of natural light coming through its windows. However, you want it to be completely dark during the night so that you can enjoy uninterrupted sleep, thus it’s important to consider the effect of both light and dark when planning your master bedroom. This will make it possible for you to design your windows in a way that balances both. While large floor to ceiling windows are currently in vogue, blinds are often used to shut out the moonlight at night, while opening them up during the day allows the sun to come in.

Theme

Choosing a theme is probably one of the most exciting aspects of all remodels. Theme choices include minimalist, tropical, beach-chic, Victorian or Oriental, to name but a few examples.

Views

Position your master suite to overlook whatever views you have access to from your home, whether it is ocean views, garden views, pool views or even courtyard views. All can be pleasant to look at from an elevated position.

Sitting Space

Most master bedroom Escondido painters also embrace having a sitting area a few paces from your bed, which can be used as a private space where you can relax, read or write in peace and quiet.  

Outdoor Access

Trends show that modern-day homeowners prefer master bedrooms that open onto private patios or balconies, and it’s not hard to see why. There’s nothing better than starting the day by taking in the sunrise from a lavish patio that overlooks your garden while you enjoy your cup of coffee.

Fireplace

You can integrate a fireplace into your master suite as an anchor for your design scheme. Just be sure to consult with your local municipality before you continue with your remodels, just to find out if wood-burning fireplaces are allowed, as most states only allow gas burning ones.

Ceiling Design

Think about it; most of your time in your bedroom is spent on your back gazing at the ceiling, so it makes sense to design it with that thought in mind. Luckily, you have infinite choice when it comes to available ceiling finishes for flat ceilings, while exposed ceiling trusses add charm and interest to any master bedroom.  

Entertainment

There are plenty of beautifully designed surround sound systems that you can include in your master bedroom as part of the décor, and music can play a big role in setting a particular mood in your master bedroom. You can also choose to incorporate a built-in flat screen TV to enjoy private movie nights from the comfort of your bed.

Open Heart Pruning for Flowering Cherry Benefits

Developed over generations of choice in Japan, flowering cherries (Prunus spp.) furnish spectacular spring elegance and graceful kind to spring landscapes in U.S. Department of Agriculture hardiness zones 5 through 8, extending to zone 9 for the range Amanogawa. Flowers are double or single, ranging from almost white to deep pink. Trees are 25 feet broad and 25 to 30-feet tall. Shape differs from columnar -shaped, horizontal-spreading, weeping or upright depending on the cultivar that is specific. Flowering cherries usually do not require pruning, but they require when youthful shaping.

Open Heart Pruning

There are two primary techniques of pruning fruit-trees in common: leader pruning and open heart pruning. Open center pruning retains the tree crown reduce high in relation to the leader approach and develops a spreading element for the varieties of cherries. As the tree matures this increases accessibility of the show. It opens up the heart to light and air movements of the tree.

Early Pruning

Open heart pruning begins by by eliminating the leader that is central in the recently-planted tree that is youthful, trimming back it to about 30-inches high. Four powerful scaffolding branches that can develop to the primary framework of the tree or three are chosen, leaving 3 to 4 inches of trunk between the branches that were rising and starting 14 to 18-inches in the ground. About three months following again three to one month later and the pruning, eliminate shoots that take on the scaffolding branches that are chosen. Through the second-year of development of the tree, again eliminate shoots besides the branches that are selected. Cut the branches back to comparable lengths for development that is symmetrical.

Maintenance Pruning

Examine it yearly as the tree grows. Remove the ones that are crossing near to or rubbing against other branches at the same time as diseased, injured, dead or broken branches. On trees that are grafted eliminate water sprouts or any suckers rising from below the graft region. Maintenance pruning after bloom is is completed in late spring or early summer for two factors. Flowers are made on the progress of the previous season’s, therefore winter pruning eliminates flowering wood. Trees including cherries, in the genus Prunus, are vulnerable to infection by cankers, which spread by spores entering wounds in cold temperatures and drop.

Pruning Cuts

On youthful trees with small-diameter branches, use clear, sharp pruning shears to make pruning cuts. On branches over an inch in diameter, use a pruning noticed as well as the -cut approach. Make one cut on the underside of the branch halfway through it. Then produce a 2nd cut from the first-cut about three inches a way on the most notable of the branch and toward the branch tip. The fat of the branch can split the limb involving both cuts. Make an ultimate and third cut prior to the branch bark ridge leaving a brief stub in the place of cutting the branch le Vel together with the trunk area. This decreases the possibility of decay. Therapy is n’t needed by pruning wounds with any type of dressing.

See related

How to Re-Grout Ceramic Flooring

The grout between floor tiles can become unattractive because of chips, cracks, stains and grime that damage the appearance of your flooring. When the grout has deteriorated into a place that it can’t be restored by cleansing, recoloring or re-sealing, it is possible to revitalize your tiled ground by by eliminating the old grout and changing it with clean grout.

Remove outdated grout using a diamond- blade on the multi-tool that is oscillating. An multitool rented or may be bought from home and components facilities. These resources vibrate the blade at very high velocity to grind away the grout. Follow the lines in the tile, operating then and in the extended course in the path that is broad. Grind the grout down into a depth equivalent to at least half the thickness of the tile.

Chip away any grout remaining along corners and the edges of the tiles using a tiny and hammer chisel. Tap the chisel using the hammer to knock the components of of grout off. Take care itself. Brush away the items of of grout right into a dustpan. Clean the area with isopropyl alcohol. Before re-grouting replace any broken tiles.

Pour 1 cup of grouting compound to the tub that is little. Add water and stir together with the putty knife before the grout is a consistency also crumbly nor too soupy. Let the grout stir it before using it upon the tile and sit for 10 minutes. Stir every 10 minutes while grouting.

Force the grout into the joints between the tiles using the rubber grout float. Stroke the float over the diagonally from gouging the grout to keep. Use the float to eliminate excess grout in the tile surface. Work a little part in a time, covering an area it is possible to reach without walking over grout that is clean. Discard it, in the event the grout gets dry and blend another batch.

Allow the grout in the area that is freshly grouted to set for 1-5 minutes. Dampen a sponge and wipe excess grout. Wipe across each joint. Rinse the sponge frequently. Grout extra sections before the floor is completed. After finishing the last area wait a-T least 60minutes. Buff off any remaining grout haze from your tiled floor having a clear gentle fabric. Don’t walk-on the ground for 2 4 hrs.

See related

20 Important Home Heating Tips

Close to 40% of the energy consumption in the house goes to electricians Chico CA. More than 95% of this statistic accounts for non-renewable sources of heat. At the moment, there is an urgent need to protect the environment, especially by focusing on environment-friendly ways of generating energy in the homes and places of work.

We have prepared a list of tips below to help you in this process.

Increase Wall Insulation

Insulation is not an easy task. However, when done properly, it is an effective way of keeping your home habitable and maintaining a low bill. You should consider increasing insulation in the walls.

Increase Attic Insulation

For the attic, you must take some time and figure out what is sufficient and what is surplus to requirement. The Department of Energy has a guideline for each region, which can guide you on how much insulation you should add to the attic.

Use Recycled Insulation

There are cheaper and environment-friendly methods of improving insulation in your home. You can use old blue jeans or recycled paper. Blow the insulation material into the attic or walls. You just need to find one of the local companies that offer these services.

Find Drafts

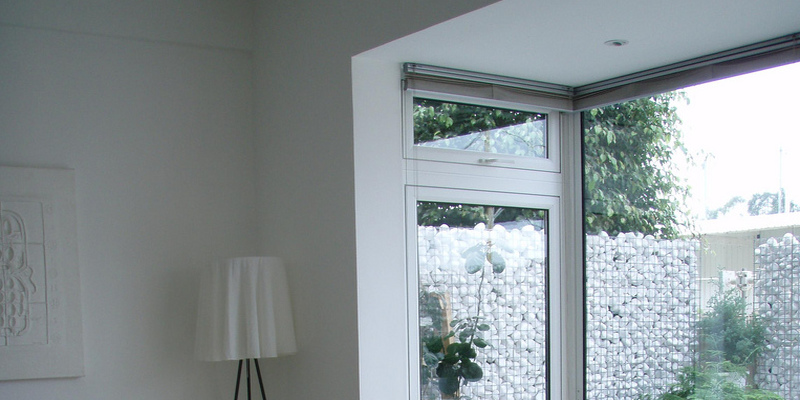
It is easy to detect draft at home. Walk around the perimeter of the windows and door jambs on a windy day with a light string, a strand of hair or a lighter. If either of these is blown away, you have to consider proper insulation.

Seal All Drafts

If your draft problem is restricted to window frames and other immovable places, foam sealant or silicone caulking will work for you. In the case of movable items, weather stripping or rolling up a towel can also help.

Don’t Forget Pet Doors

You cannot easily avoid draft from the pet doors. However, you can install a heavy curtain on both sides of the door, or weather stripping. In case the pet door is close to a sliding glass door, it will also need weather stripping.

Take Advantage of Passive Solar Heating

During the low winter, you can use the position of the sun to keep your house warm. Just keep your curtains open during the day, especially for the windows facing west and south. Remember to remove the solar shade screens during this season.

Don’t Use Exhaust Fans

Exhaust fans are notorious for consuming a lot of the warm air in the house, especially when used continuously. Turn them off as soon as you can.
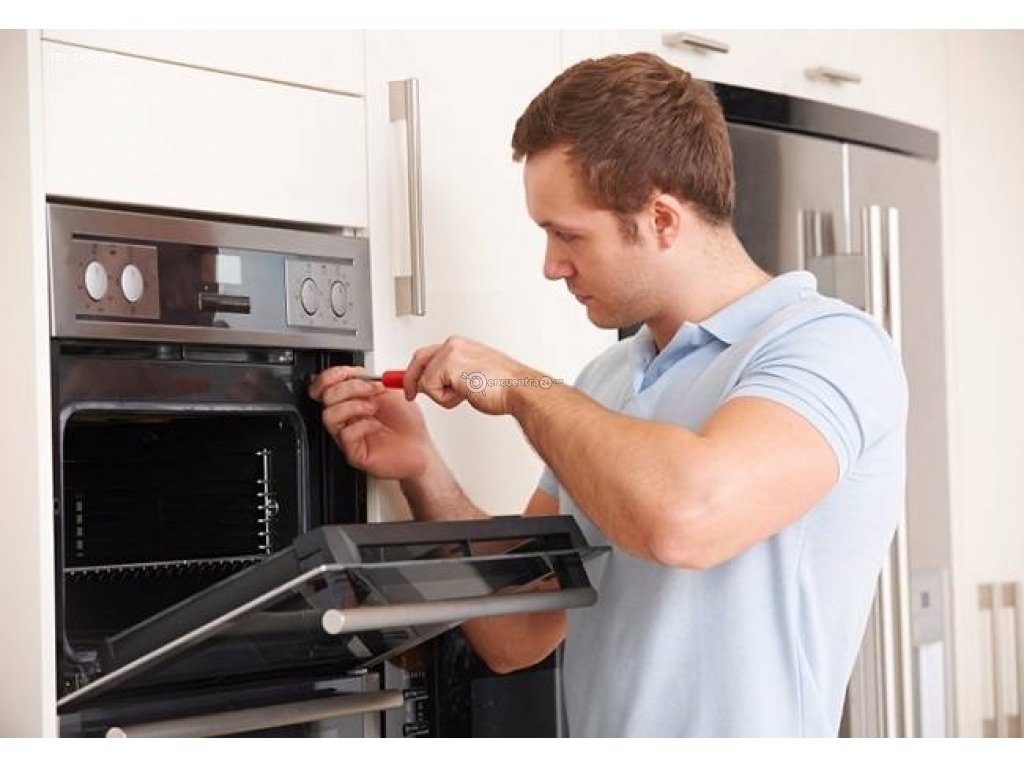
‘Reuse’ Oven Heat

You can use the heat in the oven to keep your kitchen warmer during the cold season. When you are done cooking, just leave the oven door open and the warm air will circulate.

Skip the Gas Fireplace

Central home Chico electricians is a better alternative to a gas fireplace. This is because gas fireplaces usually consume more energy.

Utilize the Wood Fireplace

A wood-burning stove or fireplace will generate more heat than your gas fireplace. Since you can burn scrap wood, it is also cheaper.

Reverse Your Ceiling Fans

Install fans that are designed for reverse operation during the winter. This mode prevents heat from dissipating through your walls or roof.

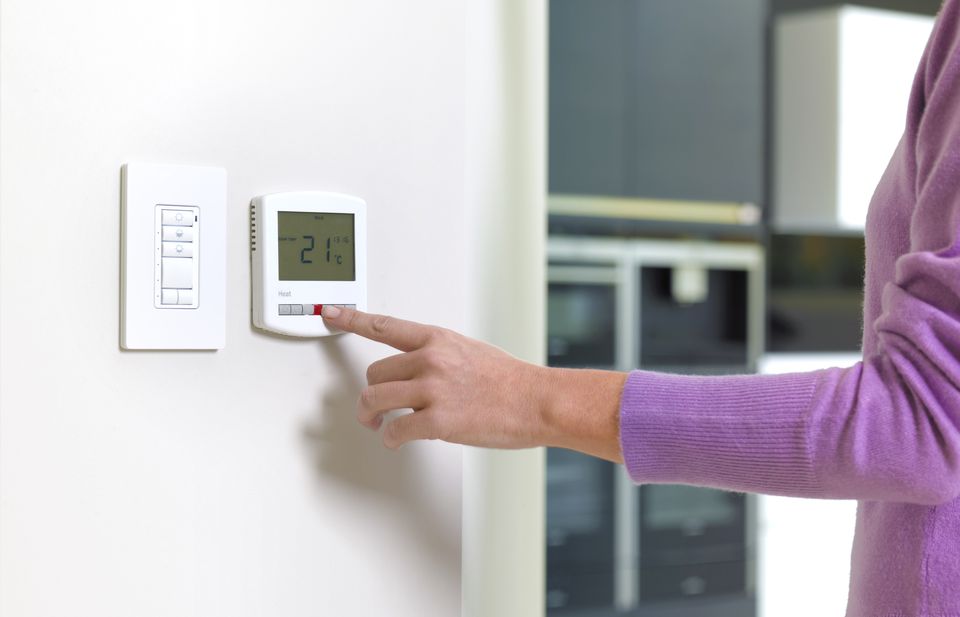
Keep the Temperature Steady

Make sure your temperatures are kept steady. By maintaining a steady range, the thermostat will not have to work overtime.

Keep the Thermostat Low

You can train your household to lower the temperature setting by 1-2 degrees every year. You should also find a comfortable range for the day and night temperature.

Acclimate

Try and maintain a steady temperature range in your car, so that your body does not have to struggle to acclimatize when you get home.

Dress for the Season

With the right clothes for the season, you will barely have to push your temperature limits irrespective of the prevailing weather conditions.

Consider a Space Heater

There are scenarios where it will be better to use a space heater, especially for small rooms, compared to the central heat system.

Stick to Warm Foods

Hot foods usually make the body feel warmer faster. Cold foods, on the other hand, tend to have a cooling effect, which lasts longer during the cold season.

Hang Curtains

Get heavy curtains during the cold season and hang them over your windows. Heavy curtains improve your insulation and trap more heat in the house.

Place Rugs in High-Traffic Areas

For the areas that experience a lot of traffic, get area rugs. This works well especially for hardwood floors and improves your insulation effort.

The best way to Heat an Room

Remodeling a dusty attic right into a area is a useful method entice potential customers and to enlarge a house usable square footage. The top-most part of a house can become cold during winter evenings that are cooler. Homeowners have a number of alternatives that are different to warm an attic space efficiently for the greatest comfort.

Tapping In To Present Central Heating

A common attic doesn’t ordinarily have have duct work supplying warmth from a central furnace method, however you can add a “T” joint in to current ducts close to the attic to produce a heating pathway. The joint doesn’t permit the current heating while permitting a part of the warmth to be partitioned off to the attic to stay in tact for the remaining home. Include a vent on the entrance and you or your builder wants to cut a hole in the wall of the attic where the duct ends. It’s good practice to include a thermostat that is multi-zone therefore the temperature of the attic is managed independently in the remaining house.

Baseboard Heaters

A attic area could be heated with baseboard heaters. Two heaters or one may be attached to the baseboards and attached to to a power outlet. Since heat rises, the the heat in the heaters rises up from the floor to the ceiling to heat the space of the attic. These heaters are particularly helpful in limited areas simply because they remain flush from the wall and baseboard region. Moreover, these heaters are usually fixed to the base Board or wall with screws; they’re risk-free from any suggestion overs that will cause a fire-hazard.

Space Heaters

When the attic area is mainly utilized for sleeping, somewhat than as a day-time work place, an area heater is a useful addition to warmth the area. An electric area heater established to get a specific comfort temperature and may be positioned anyplace in the area. It needs to be situated a-way from objects, like clothes or curtains. These heaters aren’t intended to heat an area completely; they supply temporary warmth for occasional space use. Users should seem for designs that have a computerized shut-off characteristic and strong bases; any suggestion overs that are accidental trigger the the area heater to turn off instantly to avoid a fireplace.

Considerations

If set in a top temperature, electric heaters will use an important amount of electricity. Residents should keep the heater established a-T a temperature that is comfy, although lower, including at 7 levels Fahrenheit. When it’s in use moreover, you also ought to heat the attic location; heating a clear attic space wastes power.

See related

How to Repair Household Appliances

Whether you’re dealing with a broken washing machine or a faulty kettle, learning to repair your own appliances can help you save a ton of money that you would’ve otherwise spent on hiring a professional repairman. Little do most people know that it doesn’t take much to repair the common household Chandler appliance repair that we use on a daily basis, and most require only the use of very simple and inexpensive tools. You’ll also find that sourcing replacement parts is relatively easy and can be done online at reasonable rates. Read on to find out how to fix some of the most common problems that you’re sure to come across with your ovens and other electrical appliance repair Chandler AZ.

No Heat on the Electric Oven

What do you do when your oven doesn’t heat up when you switch it on? A good first step would be to pull out the element back to examine the wires. If you find chipped, frayed or broken wires, then cut away the damaged areas while removing a miniscule amount of the insulation part.

One of the major causes of a faulty electric oven is a burned out element. However, if your oven lights still come on with perhaps lukewarm heat, then you might just need to simply switch on the circuit breaker to solve this problem.

No Heat on the Gas Oven

If your gas oven won’t switch on even after you’ve plugged it in then you might be dealing with a problem with the lighting mechanisms, which are as followed:

1 – Spark Ignition: The click sound that you hear when your oven switches on is caused by the spark ignition, but it is not a common component in the construction of modern gas ovens.

2 – Pilot Lights: The pilot lights are what give the burner its flame to ignite the oven. This component is accessible and easy to spot through the opening of the boiler rawer. Close to the tip is a thermocouple cylinder that when broken, can compromise the functionality of the entire pilot light.

3 – Glow Coil Igniters: Lastly, close to the back of the burner component is a glow coil igniter which glows every time you switch on the oven, thus signaling the burner to alight through the gas valve opening.

You can fix this problem by first removing your oven racks so that you can work freely, followed by the metal burner on the bottom. Take this opportunity to clean out any accumulated dirt inside the holes of the burner. Next, you should loosen the igniter by removing the screws and disconnect the terminals to the old igniter in order to connect a new one, and then safely place the wires again and put the igniter together using the screws you undid earlier.

Gas Dryer Won’t Heat – The Igniter Doesn’t Heat Up

To fix a faulty gas dryer, you can start by unplugging the wires that connect the dryer to the burner assembly and turn the dryer on by plugging it in. Light the tester by pressing its leads into the dual terminal. If that doesn’t work, try the thermofuse by disconnecting the dryer, as well as the two wires that connect to the thermofuse. Fix the multimeter to setting RX-1 while making sure that the leads are on each terminal, and if the dial is still blank then it’s time to replace the thermofuse.

You might also need to lift the burner assembly out, for which you must first switch off the gas valve which is placed close to the burner. Make sure that the multimeter is set to RX-1 and link the two probes with the igniter leads using their tips to get a reading and if you don’t then that means the igniter is no longer functional and will need to be replaced. To replace the igniter, unscrew it and slip the new one in its place before screwing it in place.

Gas Oven Doesn’t Heat – The Igniter Heats Up

If the igniter is heating up while the gas oven is not heating up, you should remove its old coils by unscrewing from the metal cover so that it’s easier to lift it out. Then, insert the new coils by sliding them onto the available metal posts and place the metal cover back on again.

Electric Dryer Won’t Heat

To fix this problem, you need to unplug the dryer first and then disengage the wires of the heating element before testing it with a multimeter. If nothing happens, that means your heating element has malfunctioned and needs to be replaced.

Detach the screws which keep the lint catcher attached to the top and then lift the hood with the help of a stiff putty knife and tilt it up until you see the heating element. Then, get rid of the top bracket and install a new heating element by removing the lid enclosure. Once again detach the four wires that connect it to the machine. Put in the new element in the opposite order, and slowly return the rest of the parts, starting with the top bracket followed by the lid and two screws.

The above repair tips for gas and electric appliance repair Chandler are just an example of how easy and simple it can be to repair the appliances in your home. As you can see, you don’t need elaborate equipment or even that much know-how in order to fix your appliances. Sometimes it only takes willingness and the right guidance to quickly fix seemingly difficult appliance damages.